
Yesterday Mairi asked about blocking. How I do it, where I do it, what pins I have...how I manage the big stuff. There's lots of opinions on this, and many clever people have written about it.
There's a knitty article here, and if you want to see it done by someone who really, really is not screwing around, check out Judy Gibson's pages. (Note: Judy's knitting often inspires waves of jealous nausea in the unprepared. Sit quietly and let the wonder of her sweep over you until you feel a sense of respectful awe instead. This may take some time if you have recently had your arse kicked by some lace knitting.)
I am a really big fan of full-immersion multi pin blocking. I have no interest in laying damp cloths over things or lightly steaming them into shape. I want the big swish. It is the act of bending knitting to my will that I love, and I have the most control when the piece is properly wet. Usually, the blocking bath is also the first wash and since I knit all over the place, the item can usually use it. After the wash I use a simple system of strings and pins to get the shape I want and leave it to dry. This takes very little time and effort with sweater pieces or stuff like that...but can be involved with lace.
Here's the Harlot Lace blocking method...such as it is.
1. I assess the piece and come up with a plan. Any straight edges?
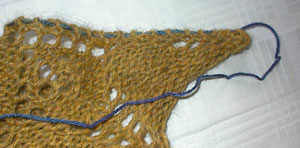
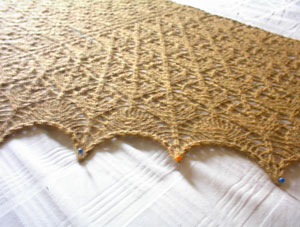
I take a darning needle and smooth yarn (a piece much longer than I think the knitting will block out to) and thread it through the edge I would like to keep straight. The example here is the top edge of a triangular shawl. I hear tell of knitters who use blocking wires for this part, but I don't have any.
2. I soak the piece in a room temperature bath with wool wash for about 10-20 minutes. Shorter for alpaca and silk....longer for stretchy wool (like merino) that is difficult to persuade.
3. Gather the knitting into a ball while it is still in the water, you don't want to lift it out so that it gets stretched or pulled out of shape while you are moving it. Lift it up, plop it onto a clean towel and wrap it in the towel. Step on it a couple of times to squish out the worst of the dripping sodden-ness. You want the thing somewhere between damp and wet.
4. I take it to my bed, which I have stripped of duvet and pillows, just leaving the clean bedsheet. I use my bed because it is big, because you can jam a million pins into it without it mattering, and because lace dries really fast. If you block in the morning it will be dry by bedtime. (If you are worried about ending up sleeping on the couch, use a fan. It speeds it up a lot.) I'm sure I don't have to warn you that if you have a waterbed or a bed covered in an electric cover that it's a really bad idea to stick pins into it, no matter how careful you intend to be.
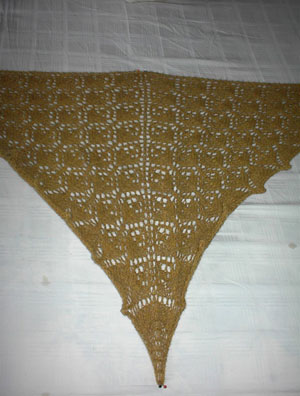
5. I spread the wet thing out and give it a little shove into shape to make sure it's going to fit on the bed the way it is. Then I stab a collection of pins into the bed and stretch the string for the top edge tightly between them.
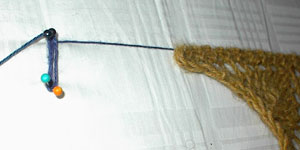
The string is a brilliant thing. If you don't use it, you will spend hours and hours trying to eliminate little scallops along the edge...
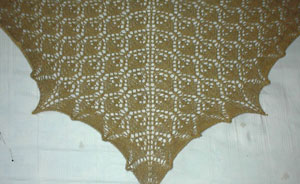
You don't want that. It's crazy making. If you have any sort of perfectionist tendencies at all, save yourself the anguish trying to get a straight edge with pins. It leads to this....
Speaking of pins, I use the dressmakers rustproof pins (that rustproof is important. You want that.) and I get the ones with the little coloured balls on the ends to reduce the odds that I will miss a pin in our bed and end up giving Joe a surprise that will also give him an opinion about blocking on the bed. (Also, whenever possible, in the interests of marital politeness, I block on my side. That way, if I miss a pin or the bed is a wee bit damp at bedtime...I'm not annoying someone who really doesn't think that properly blocked lace is worth sleeping in a wet bed.)
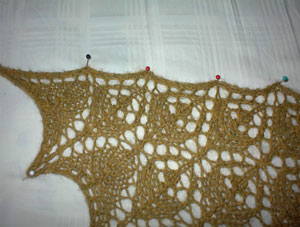
6. Using your trusty tape measure, measure out from the centre of the piece and pin the two points (or edges or whatever your thing has).
7. Follow down a centre line and pin the point (or bottom edge, or whatever your thing has.)
Don't worry about how lame it looks right now. Give it some room.
8. Pin out any points.....
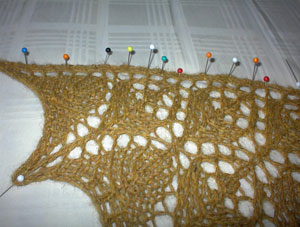
Working back and forth, side to side. Pinning the centre of one side then the other, then a point between those, then the matching one on the other side. Pull the knitting firmly, but not alarmingly, since it is possible to break a thread if your knitting is fine, and you really will have to go lie in the road if that happens.
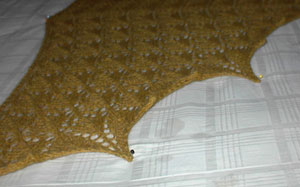
(Note: any spots you see on the sheets are water from the shawl, not anything on my bed that you don't want to know about. I can't believe I typed that, but Rams would never let it go if I didn't cut her off at the pass.)
9. When the whole thing is pinned out, take a look. Do the sides look even? Are your slopes straight? Is there any pins or strings you can move? If it is very stretchy (like merino) you may find that once the lace has been pinned out and "rested" for a few minutes, that it can be further pinned out, moving the pins further outward, stretching the lace more.
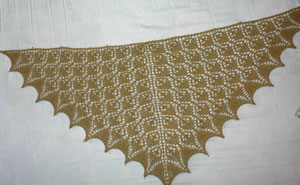
(That picture is totally crooked because I was too short to get the whole thing in the frame. I was also too lazy to go get a chair to stand on, so I just held the camera over my head. Sorry. I'll try to be a better blogger from now on.)
10. Wait. Ken finds it helpful to admire the knitting every so often, but I stay away. I'm a little on the obsessive side and I find a pin to move every time, so it's better for me to go out.
When the lace is thoroughly dry (and not one second before.) you may unpin and dance around with the it held aloft. Show the cat. Show your neighbours.
Party hard on the thrill of blocking.