
Note from Steph: There is no baby yet, but there are signs that it won't be long. (Teresa is well, though extraordinarily pissed off, and the babe, while static, is doing very nicely.) In the meantime, I continue to sit in the dungeon, finishing book 3 (it's going fine thanks. Yesterday I got a whole five hours of sleep, finished an entire chapter and only cried once. I'm not even sure why I cried. Too much coffee maybe. Is nineteen cups too much?) and Laurie (That Laurie) steps up to the guest blogger plate. Make her feel at home will ya? (And don't get used to this level of professionalism. It's back to me soon.)
L.I.D -- Laurie’s Indigo Dyeing: Part One
Or rather Laurie TRIES to do indigo dyeing, with the valuable help of her assistant Kristen. We prepared for adventure months before by buying indigo plants at the Maine Fiber Frolic. We will draw a discrete veil over attempt one in which we clipped the tips of the plants in the two flats of six I brought back and planted in my garden. Trying to dye using too few indigo leaves that are themselves too young does not work. Let us leave it at that. However, by mid-July, we had enough indigo (note to self: do not plant the indigo so close to the basil plants next time. See the basil in the lower corner of the picture? Fortunately Indigo leaves are a lot flatter than this species of basil!):
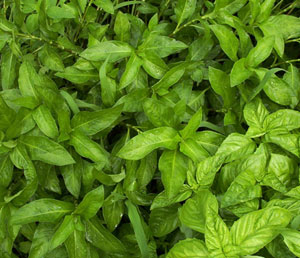
Even more important, telltale water droplets had marred a few leaves revealing this:

See the blue?? Definite blue. There was lots of indigo; the plants were mature enough; we were ready to go! We used the information from this site , but we also discovered some things on our own. Kristin and I settled in for LONG day of dyeing. Little did we know HOW long!
We picked about 28 ounces of indigo leaves – observe the harvest. The leaves are in the jars to be heated and the remainder stems are in one of our many bowls:
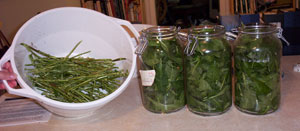
Just following instructions: “Strip the leaves from stalks and cram them into a gallon glass jar (or a plastic bucket or a stainless steel or enamel pot -- any non-reactive container). Fill the jar with water and place it in another pot on a trivet or some jar lids (you are creating a double boiler).” Here are the jars in their double boiler:

So far so good, right? Just you wait!!
Posted by Stephanie at November 7, 2005 07:19 PM